I have the device
Connect and ride
Fit it using the original connectors, then open the panel in the browser of any phone.
Start with installation Already fitted? Connect your phoneAPIOLI LINK ONE · Getting started
Already have your device? We’ll guide you through fitting it and connecting your phone. New here? Start with the product overview.
I have the device
Fit it using the original connectors, then open the panel in the browser of any phone.
Start with installation Already fitted? Connect your phoneI’m exploring
Explore the features, check bike compatibility and try the interactive panel demo.
Explore the product on our homepage01 · Fitting the device
No cutting, no soldering. You plug the device in between two connectors the bike already has: the display cable (green end) and the throttle cable (yellow end).
Before fitting, turn the bike off with the display. Taking the battery out of the frame is recommended, but not required.

The box holds the unit with a single harness. It has two pairs of connectors: green (plug and socket) go to the display cable, yellow (plug and socket) to the throttle cable.

Find the cable that runs from the display on the handlebar to the motor. It has a connector with a green end, usually at the handlebar or right where it enters the frame.

Same for the throttle cable: it has a connector with a yellow end, between the throttle and the motor.
Ideally slide the device into the frame, next to the connectors, somewhere sheltered. The cables must not be stretched or pinched. You can fix them with a cable tie.
If you took the battery out, put it back. Turn the bike on. If the display turns on and looks as usual, the device is plugged in correctly and already working. If it does not turn on, check that the green connectors are pushed all the way in.
Now open the panel in your phone browser, over the device Wi-Fi. The steps are below.
02 · Two ways
Android
Install it once, connect with PIN 0000 and you are done. The phone stays on its own Wi-Fi or mobile data, nothing to switch.
iPhone and Android
Nothing to install: join the device Wi-Fi and open the panel in the browser. Works on iPhone and Android.
Using an iPhone? Choose the Wi-Fi panel. The iOS app is in the works.
Android app
App: Android 8 or newer, version 0.2.2, 658 kB · iPhone: over Wi-Fi, app in the works
On your Android phone tap Download the app. The app is not on Google Play yet, so you install it from the file.
Open the downloaded file. The phone asks whether the browser may install apps: allow it, then tap Install. This permission only covers the browser and you can turn it off later.
Turn the bike on with the display button. The device then sees the controller and shows up over Bluetooth as APIOLI-XXXXXX.
Open the APIOLI LINK ONE app, allow Bluetooth access and tap your device in the list. On the first connection the phone asks for a PIN: enter 0000. After that it connects on its own.
In the panel open Advanced, Bluetooth and save your own PIN (4 to 6 digits). Then a stranger's phone nearby cannot pair with your bike. A phone that is already paired keeps working.
Panel over Wi-Fi
On an iPhone and on any other phone you open the panel in the browser, over the device Wi-Fi. The phone keeps its mobile data internet meanwhile.
Once you add your home network in the panel, the device joins it by itself. From a phone on the same network, open http://apioli-link-one.local/. On iPhone this address usually just works. Android browsers often don't know it, so type the device IP address instead, e.g. http://192.168.50.105/. How to find it:
03 · First steps
You set everything in the panel, in the tabs at the top. Open a step to see what to do and where it is in the panel.
Tell the device which battery you have, so the percentage and range are real. In Battery preset (frame) pick your frame or set the number of cells (13S is 48 V, 14S is 52 V) and enter the Capacity of one cell [mAh] from the label. Tap Save configuration. After the first full charge tap Mark battery as fully charged: from then on the device learns the real capacity by itself while you ride.

Turn on Send the calculated battery % to the display and controller once the battery is set up. The bike display then shows the percentage calculated by APIOLI LINK ONE. Bafang calculates it from voltage alone and reads far too low: its 0 % is about 20 % of the battery in practice, and at that point assist switches off.
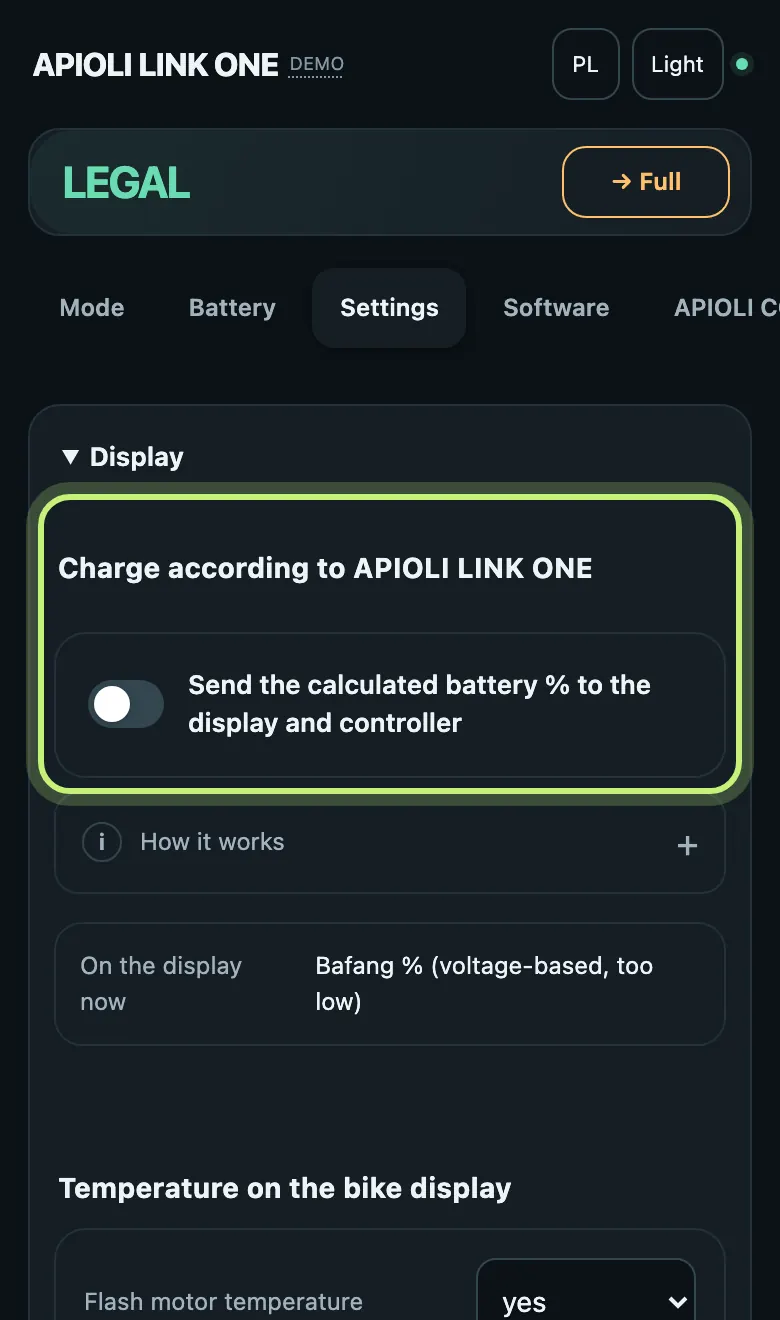
The LEGAL limit is the speed up to which assist works in LEGAL mode. By default 25 km/h, the limit for e-bikes in Poland and the EU. In How to limit speed in LEGAL keep the recommended 0 % battery · instant: mode changes then work at once, without turning the bike off.

Here you choose what the throttle does in LEGAL mode: Off (the default), up to 6 km/h, the permitted start-off help, or up to limit LEGAL. The throttle works only below the chosen speed and comes back once you slow down by 2 km/h. In FULL the throttle has no such limit.
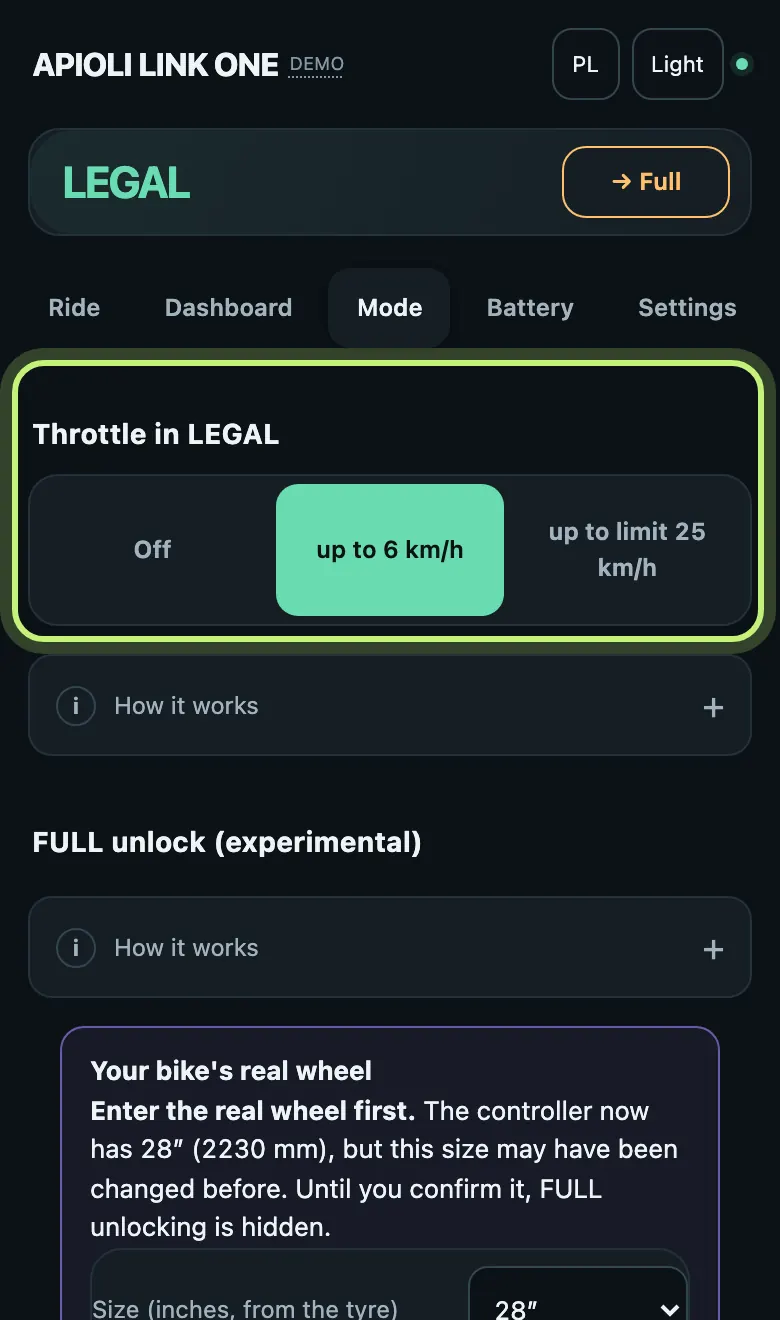
In the panel you change the mode with the Legal and Full buttons on the Mode tab or with the button at the top of every tab. Without a phone: on the bike display press UP, DOWN, UP, DOWN, at most 1.5 s apart (the default shortcut). Quick return to LEGAL without a phone: panic mode.

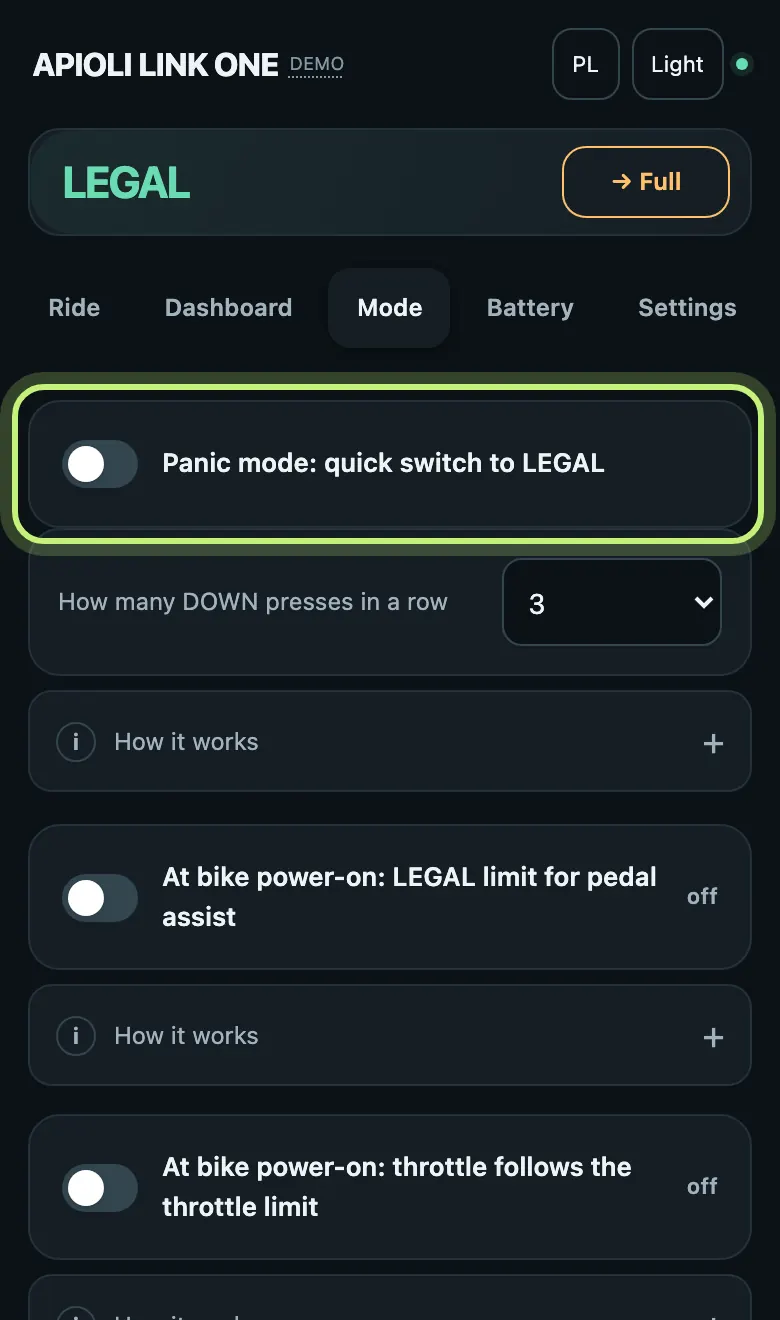
A quick way back to LEGAL without the phone, e.g. before joining a public road. Press only DOWN on the display several times in a row, at most 1.5 s apart: the bike switches to LEGAL at once, also while riding, and lowers the assist level. After such a switch it also starts in LEGAL next time.
By default it is 7 presses. You set the number in How many DOWN presses in a row (3 to 9), and the Panic mode: quick switch to LEGAL switch turns the whole feature on and off (on by default). Some displays, e.g. on the M620, do not show DOWN presses below zero: there it is enough to press DOWN quickly through at least 3 levels, into walk assist.
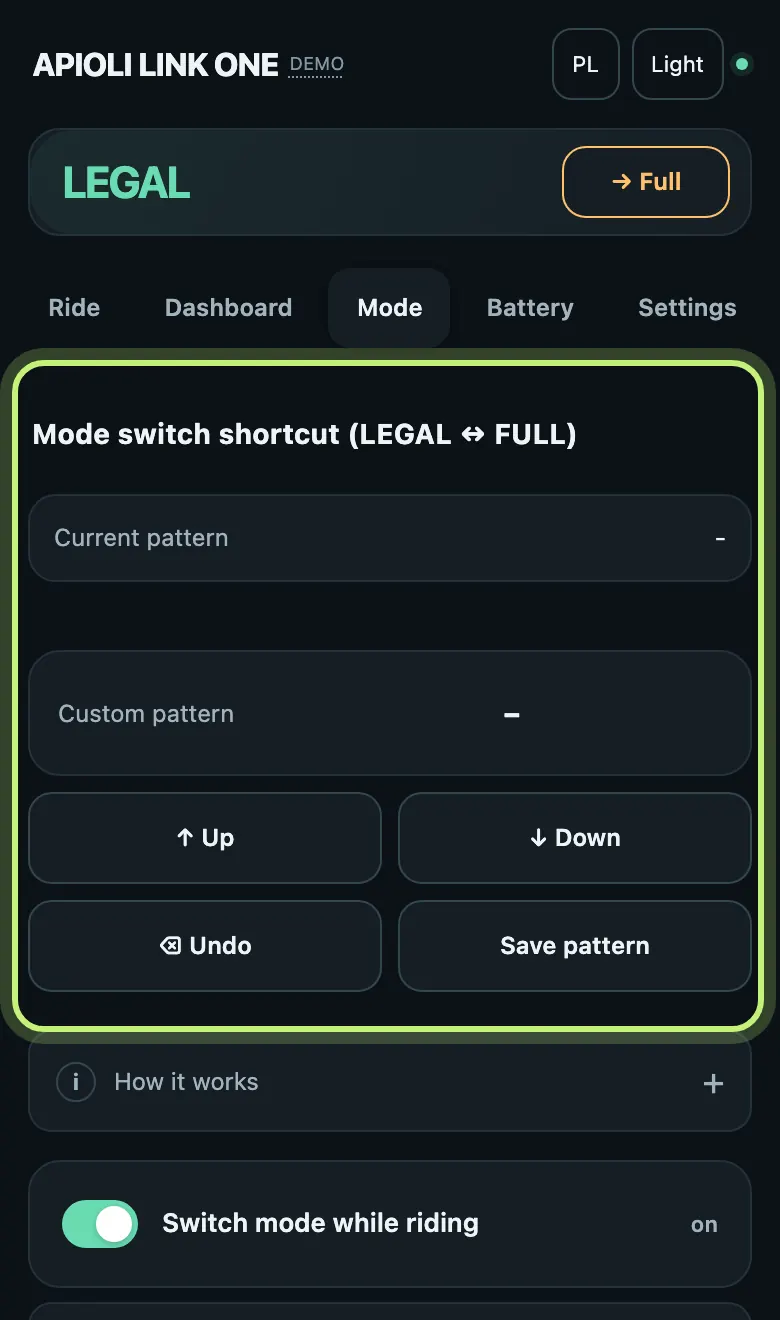
In Mode switch shortcut (LEGAL ↔ FULL) build your own combination with ↑ Up and ↓ Down and tap Save pattern. From 3 to 8 presses, with at least one UP and one DOWN, so an ordinary assist level change never switches the mode. Do not start with DOWN at level 0, because holding DOWN there turns on walk assist.
Two separate options, off by default. At bike power-on: LEGAL limit for pedal assist: the bike starts with the LEGAL speed limit every time it is turned on, even if it was in FULL last time. At bike power-on: throttle follows the throttle limit: the same for the throttle, following the Throttle in LEGAL setting. Turn both on if you mostly ride on public roads: then you never have to remember to switch.

The lock protects the bike against strangers. A locked bike will not move under power: the throttle is cut off and the controller gives no assist, so it can only be ridden as an ordinary bicycle. The lock does not change LEGAL or FULL mode.
The lock only engages when the bike is turned on. A device restart while riding never cuts the drive.

In apioli.com panel (statistics) you set the login and password for My rides, with your rides and battery state.
The device has no SIM card and no internet of its own. Your rides and ride data reach the server through the phone with the panel open, so at least once, ideally at the end of a ride, join the bike Wi-Fi with your phone and open the panel. The phone keeps its mobile data meanwhile. The option Upload logs, battery counter state and restarts in Updates and logs must be on (it is by default). The device has no clock of its own either: it dates your rides by the clock of the phone it connects to.
On the same tab: Updates from server (a new device software version, one button) and Connection (your home Wi-Fi).

FULL mode is intended for off-road use. An e-bike in Poland and the EU assists up to 25 km/h, and the device does not make the bike formally road legal. The user is responsible for lawful use.
The recommended way is setting the wheel size in the controller. It always works, whatever limit the controller accepts, and the display still shows the real speed, because the reading correction switches on by itself. The feature is experimental and tested on the Bafang M560.
The wheel size stays in the controller even without the device. If you ever want to take APIOLI LINK ONE off the bike, write to us at contact@apioli.com before you do.
Another way, which we do not recommend: Advanced: controller ceiling in FULL (45 / 60) further down the same tab writes the FULL speed limit directly to the controller (the controller maximum, e.g. 45 km/h, or experimentally 60 km/h for pedal assist). It takes effect after turning the bike off and on, and if the controller does not accept 60 km/h, the bike falls back to a safe LEGAL.


04 · Done
1 · Wheel
In the controller settings choose the tyre size of your bike. It decides whether the speed on the display and the LEGAL limit are calculated from the real wheel. Takes a minute.
2 · Home
In Settings, Connection enter your network. At home the device joins it by itself, and you open the panel from your phone without switching Wi-Fi.
3 · Rides
Set a login and password in Advanced, apioli.com panel. At the end of a ride connect your phone to the bike Wi-Fi and open the panel, then you see routes and battery state at apioli.com under My rides.
4 · Updates
In Settings, Updates from the server the panel shows whether a newer device software is out. You install it with one button, the phone downloads it from the internet.
Questions
No. The panel works in the browser of any phone, iPhone and Android: join the device Wi-Fi or, once you add your home network, open it at home. Nothing to install.
Yes, as long as you download it from apioli.com. The app is signed with our key and later versions install over it without removing the old one. It only asks for Bluetooth and internet (internet is used for device updates and diagnostic log upload).
Check that the bike is on, Bluetooth on the phone is on and the app may access nearby devices (Settings, Apps, APIOLI LINK ONE, Permissions). Come closer, within a few metres, and tap Search for devices.
Someone may have changed the PIN in the panel already. Connect over the device Wi-Fi (see Panel over Wi-Fi above), open Advanced, Bluetooth and check or set the PIN.
The device runs older software. Connect once over the device Wi-Fi and install the update from the panel (version 0.2.90 or newer), then the app works.
On a new phone just connect with the PIN. If the paired phones were removed in the panel, also remove the APIOLI device in the phone's Bluetooth settings and pair again.
Both give the same panel and the same features. The app is handier: the phone does not switch to the bike Wi-Fi and reconnects by itself next time. The panel over Wi-Fi needs nothing installed and works on any phone.
For now the app is for Android, downloaded from here. An iPhone app is in the works; until then the panel works on iPhone in the browser over the device Wi-Fi, with the same features.